


Views: 0 Author: Site Editor Publish Time: 2026-09-29 Origin: Site


Developing OEM food packaging carries significant risks. Misaligned specifications routinely cause delayed product launches. They also compromise delicate shelf-life requirements and trigger costly regulatory failures. Transitioning a container from an initial concept into physical production demands a proactive approach. We must frame this journey as a strict risk-mitigation process. Evaluating designs early eliminates guesswork. This checklist provides a reliable framework. It helps you assess custom food packaging solutions with confidence. We ensure operational feasibility, strict compliance, and budget efficiency before committing to mass manufacturing. You will learn how to navigate material selection, structural engineering, and final approvals.
A robust product brief must quantify both functional requirements (barrier properties, filling line constraints) and commercial constraints (target unit cost, MOQs).
Structural design and material selection require transparent trade-offs between sustainability goals and performance realities.
Rigorous compliance and migration testing must be factored into the timeline before finalizing structural prototypes.
Sample approval is a multi-stage process (soft tooling to production tooling) requiring strict tolerance validation.
You cannot engineer a successful packaging product without a highly detailed brief. The foundation of any project relies on understanding exact functional and commercial limits. Ambiguity in this stage leads directly to costly revisions later.
Map the packaging requirements directly against your existing or planned automated filling and sealing lines. You must consider denesting requirements carefully. If trays stick together, automation lines jam, and production halts. Line speeds dictate how quickly containers must separate from one another. Deep denesting lugs and specific draft angles prevent vacuum locks during high-speed handling.
Define exact Oxygen Transmission Rate (OTR) and Moisture Vapor Transmission Rate (MVTR) requirements based on the food matrix. Fresh meats demand highly specific gas barriers to maintain color and prevent spoilage. Dry snacks require strong moisture barriers to retain crispness. Do not rely on generic barrier terms. Quantify these metrics to ensure the material performs under real-world retail conditions.
Establish realistic cost-per-unit targets early in the discussion. Project your annual volumes accurately to negotiate better rates. Minimum Order Quantity (MOQ) thresholds often dictate which manufacturing processes make financial sense. Aligning your marketing projections with procurement realities prevents budget overruns.
Clarify mandates for recyclability, post-consumer recycled (PCR) content, or compostability. Note potential impacts on durability or cost. PCR materials sometimes exhibit slight color variations or reduced impact strength. You must transparently evaluate these trade-offs. Balancing aggressive green initiatives against actual performance realities ensures the final product remains viable.
Choosing the right substrate dictates the thermal, physical, and visual performance of your packaging. A rigorous feasibility assessment ensures your chosen material aligns with both consumer usage and supply chain logistics.
Evaluate material options against specific temperature requirements. Freezing, microwave heating, and oven-ready applications all demand different polymers. We recommend testing materials under the most extreme conditions they will face.
Material Substrate | Temperature Tolerance | Primary Application | Key Limitation |
|---|---|---|---|
APET (Amorphous PET) | -40°C to 70°C | Chilled foods, fresh produce, cold deli items | Cannot be microwaved or baked. |
CPET (Crystallized PET) | -40°C to 220°C | Oven-ready meals, dual-ovenable trays | Higher material cost and brittle when frozen. |
PP (Polypropylene) | -20°C to 120°C | Microwavable ready meals, hot takeout | Poor oxygen barrier without EVOH lamination. |
Molded Fiber | Varies (up to 200°C) | Sustainable dry goods, fresh produce | High moisture vapor transmission rate. |
Match lidding films carefully to tray substrates. Proper food service film customization prevents premature spoilage and leaks. Specify peelability requirements based on the consumer experience. An easy-peel film suits delicate snacks, while a weld seal protects heavy liquids. Incorporate anti-fog properties for clear retail visibility in refrigerated displays. Puncture resistance remains vital for sharp ingredients like bone-in meats or hard shells.
Assess the availability and price volatility of selected raw materials. Global supply chains experience frequent disruptions. Avoid future supply bottlenecks by selecting polymers with multiple global sourcing channels. Discuss secondary material options with your vendor.
Confirm that the OEM partner has the specific extrusion, thermoforming, or injection molding capabilities required for the chosen materials. Not all facilities can handle specialized laminations or high-heat crystallized polymers. Verify their equipment capabilities before signing development contracts.
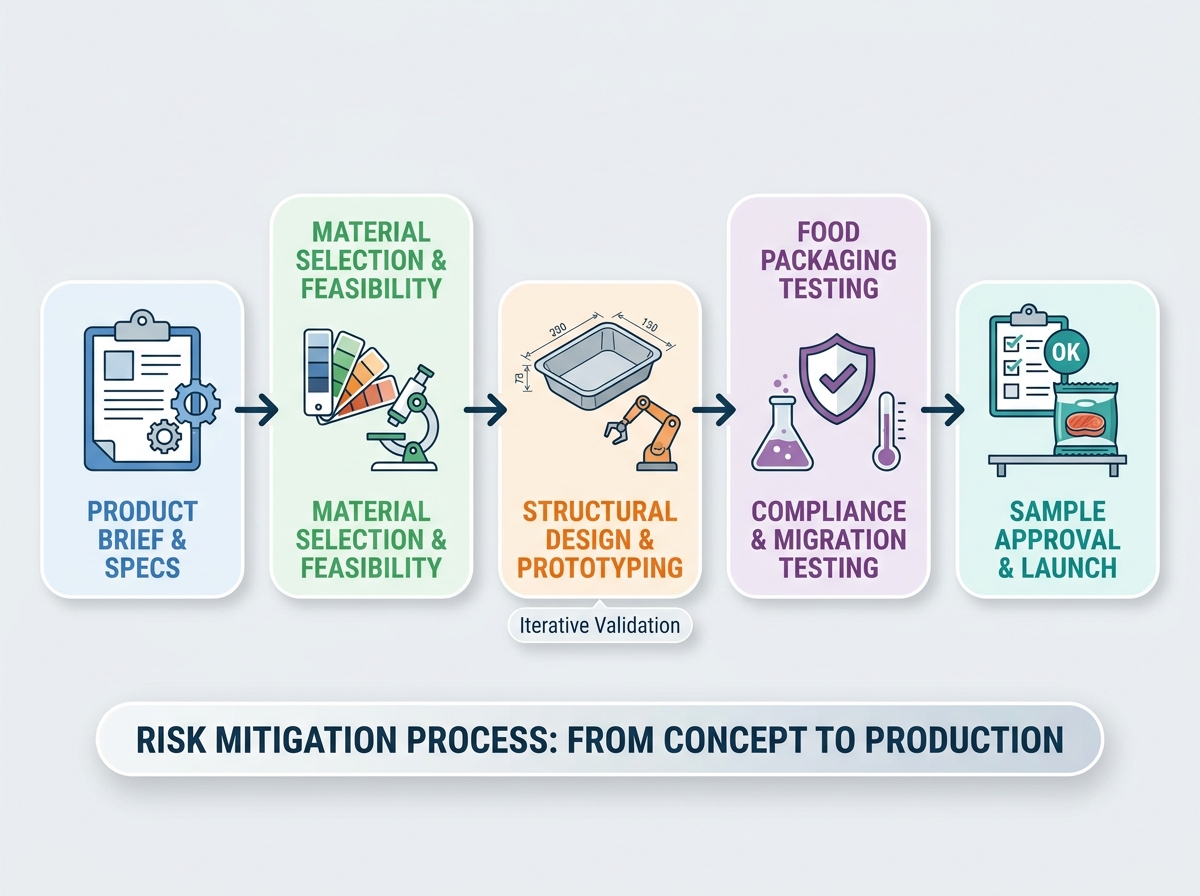
The transition from a 2D concept to a 3D structural model dictates how well the packaging functions in reality. Engineering flaws at this stage multiply costs exponentially once tooling begins.
Focus entirely on functional geometry. A well-engineered custom food tray design prevents operational bottlenecks. Ensure draft angles, ribbing, and denesting lugs are optimized for structural integrity. Draft angles allow the plastic to release from the mold cleanly. Ribbing adds vertical crush strength without requiring thicker gauge plastic. Denesting lugs separate the trays effortlessly during high-speed automated handling.
Calculate pallet utilization and warehousing density early. Base these calculations on the prototype's dimensions and nesting capabilities. Poor cubic efficiency results in shipping empty air, which drastically inflates freight expenses. A tight nesting ratio maximizes the number of empty trays you can fit onto a single pallet.
Utilize initial digital renders to identify potential weak points. Digital simulation software tests top-load pressure and drop impact virtually. Always check the seal flange width and material wall distribution before cutting physical molds. A warped seal flange guarantees leakers on the production line.
Evaluate consumer-facing features rigorously. The best engineering still fails if the consumer hates using the product. Include intuitive opening mechanisms like extended peel tabs. Re-sealability keeps multi-serve products fresh longer. Finally, evaluate the visual merchandising appeal. Trays must stand out on retail shelves while clearly displaying the food inside.
Food contact packaging faces strict global oversight. Failing to document compliance properly can trigger immediate product recalls and damage brand reputation permanently.
Verify alignment with FDA, EFSA, or regional food contact materials (FCM) regulations. Different markets enforce different baseline standards. European regulations typically update faster regarding recycled content limits. Ensure your engineering team cross-references the destination market's current legal framework.
Mandate protocol testing for overall and specific chemical migration. You cannot assume a material is safe universally. Base your testing protocols on the specific food matrix.
Acidic Foods: Test migration using acetic acid simulants. High acidity pulls plasticizers out of polymers faster.
Fatty Foods: Use olive oil or ethanol simulants. Fats accelerate the migration of ink components and adhesives.
Aqueous Foods: Test with distilled water simulants. Determine how long liquids can sit before compromising the substrate.
Thermal Variables: Replicate the exact heating instructions. Microwave and oven temperatures drastically alter migration rates.
Require a comprehensive Declaration of Compliance (DoC) before moving forward. Collect traceable certificates of analysis (CoA) for all resins, additives, and inks. Document traceability ensures you can isolate specific production batches if a contamination issue arises.
Outline parameters for drop tests, transit simulation, and thermal shock testing on early-stage prototypes. Thermal shock testing involves moving filled containers directly from a freezer into a commercial oven. Transit simulation replicates the intense vibrations of long-haul trucking. Identify fractures and weak seals before full production.
Sample approval protects your capital investment. Rushing this stage often results in hundreds of thousands of useless containers that cannot run on your machinery.
Start with low-cost prototype tooling to validate form and fit. Soft tooling uses cheaper aluminum and degrades quickly, but it provides perfect early-stage samples. Only release capital for production (hard) tooling once the soft sample passes all line trials. Hard tooling utilizes hardened steel and represents a massive financial commitment.
Run the physical samples through your actual heat-sealing equipment. Do not rely solely on vendor lab tests. Verify dwell time, temperature compatibility, and burst strength. Sealants react differently based on ambient plant humidity and your specific machinery's pressure settings.
Measure dimensional accuracy meticulously. Check the material thickness distribution against the agreed-upon technical drawing specification (TDS). Thermoformed trays often thin out in the deep corners. If the corners thin out too much, the tray will shatter during transit.
Create a binding checklist for stakeholders to formally approve the first-off-tool (FOT) samples. A formal matrix prevents miscommunication.
Operations Team: Validates line speed compatibility and denesting performance.
Quality Assurance (QA): Confirms barrier properties, leak rates, and compliance documentation.
Marketing Team: Approves aesthetic clarity, labeling space, and brand alignment.
Procurement: Verifies the final unit weight aligns with the quoted cost targets.
A brilliant design requires a capable manufacturing partner. Vendor selection determines whether your project stays on schedule or faces endless iteration loops.
Prioritize vendors who control both design and manufacturing. Fragmented supply chains introduce friction. When one company designs the tray and another cuts the mold, accountability vanishes. Vertically integrated partners reduce iteration delays and solve engineering conflicts internally.
Look for verifiable certifications that guarantee sanitary manufacturing environments. BRCGS, SQF, and ISO 9001 represent the gold standards in packaging safety. These certifications prove the vendor maintains strict hygiene controls, pest management, and hazard analysis protocols.
Clarify upfront whether you own the custom molds upon project completion. Many vendors amortize the tooling cost into the piece price but retain ownership of the physical mold. Understand the maintenance terms. Define clearly who pays for tool repairs after one million cycles.
Evaluate the vendor's ability to handle surge volumes. Successful product launches often outpace initial forecasts. Ask about secondary disaster-recovery manufacturing sites. If a regional power grid fails, your vendor must have backup facilities to keep your supply chain moving.
Successfully developing OEM packaging requires a disciplined journey. You must define a strict product brief, evaluate material constraints accurately, and execute rigorous physical testing. Skipping any of these evaluation phases inevitably leads to costly operational failures on the filling line. Proper sample validation secures your investment and guarantees consumer safety. A methodical approach transforms complex polymer science into reliable, high-performance retail solutions.
Audit your current product brief today. Review your barrier requirements and tooling expectations. We recommend requesting a technical consultation with your manufacturing partner to assess the feasibility of your next custom packaging project before releasing any capital.
A: A standard development timeline spans 8 to 16 weeks from concept to approved production samples. This duration accounts for initial CAD rendering, 3D printing, soft tooling creation, physical line trials, and the extended lead times required to cut hardened steel production tooling.
A: Prototype (soft) tooling uses cheaper, softer aluminum designed for short runs to validate geometry and fit. Production (hard) tooling uses hardened steel or beryllium copper. Hard tooling costs significantly more but withstands millions of high-speed thermoforming cycles without degrading.
A: Ownership depends on the contract. If you pay for the tooling upfront, you typically own the mold and intellectual property. If the manufacturer amortizes the cost into the unit price, they generally retain ownership, binding you to their facility for production.
A: You must share your machinery specifications, including denesting mechanics and sealing head dimensions, during the initial briefing. Furthermore, you must conduct physical line trials using first-off-tool (FOT) samples on your actual equipment before approving mass production.


